I'm so excited to pull out our table runner from last year! The kids have grown SO much already.
When
we went to SeaWorld over the summer they had a Handimal Art for sale.
They have the family put their hand print on a canvas and they make
animals out of them. It's really cute and I really wanted to do one. I
still want to do ducks for our bathroom. I've seen places that make
art out of children's hand/foot prints for their room. I love it!
I
decided to make a hand Turkey table runner for Thanksgiving. I am not
very crafty or artistic, so I was a little worried on how it would turn
out.
Materials:
Table
runner - I was hoping Walmart would have a plain cheap one (I didn't
have time to go other places to look). I found this one for $13.
Fabric Paint (Brown, Red, Yellow, White, Black, Orange)
Paint Brushes
Fabric markers
Paper plate (or something to make a palette for mixing colors
Leaf
Hands of each member of the family
I marked the center with one of Sissy's hair clips.
I
mixed brown and white to make a lighter brown for the turkeys and
mostly because I knew I needed a lot of brown. I needed to stretch it
further. I painted on our hands and had each person put their hand
print on the table runner.
I
was going to paint the fingers different colors, but I realized with
Sissy's that it was drying to fast and not coming out even, so I just
went with all brown with the rest of us.
I
painted in the spaces and added the colors to our fingers. I added the
extras to the turkeys. I was carefully using a paint brush for all of
the details and when I was finished I remembered the the fabric paint
has a thin pen like applicator. Duh! It would have been easier to just
use them. See...I'm not that crafty.
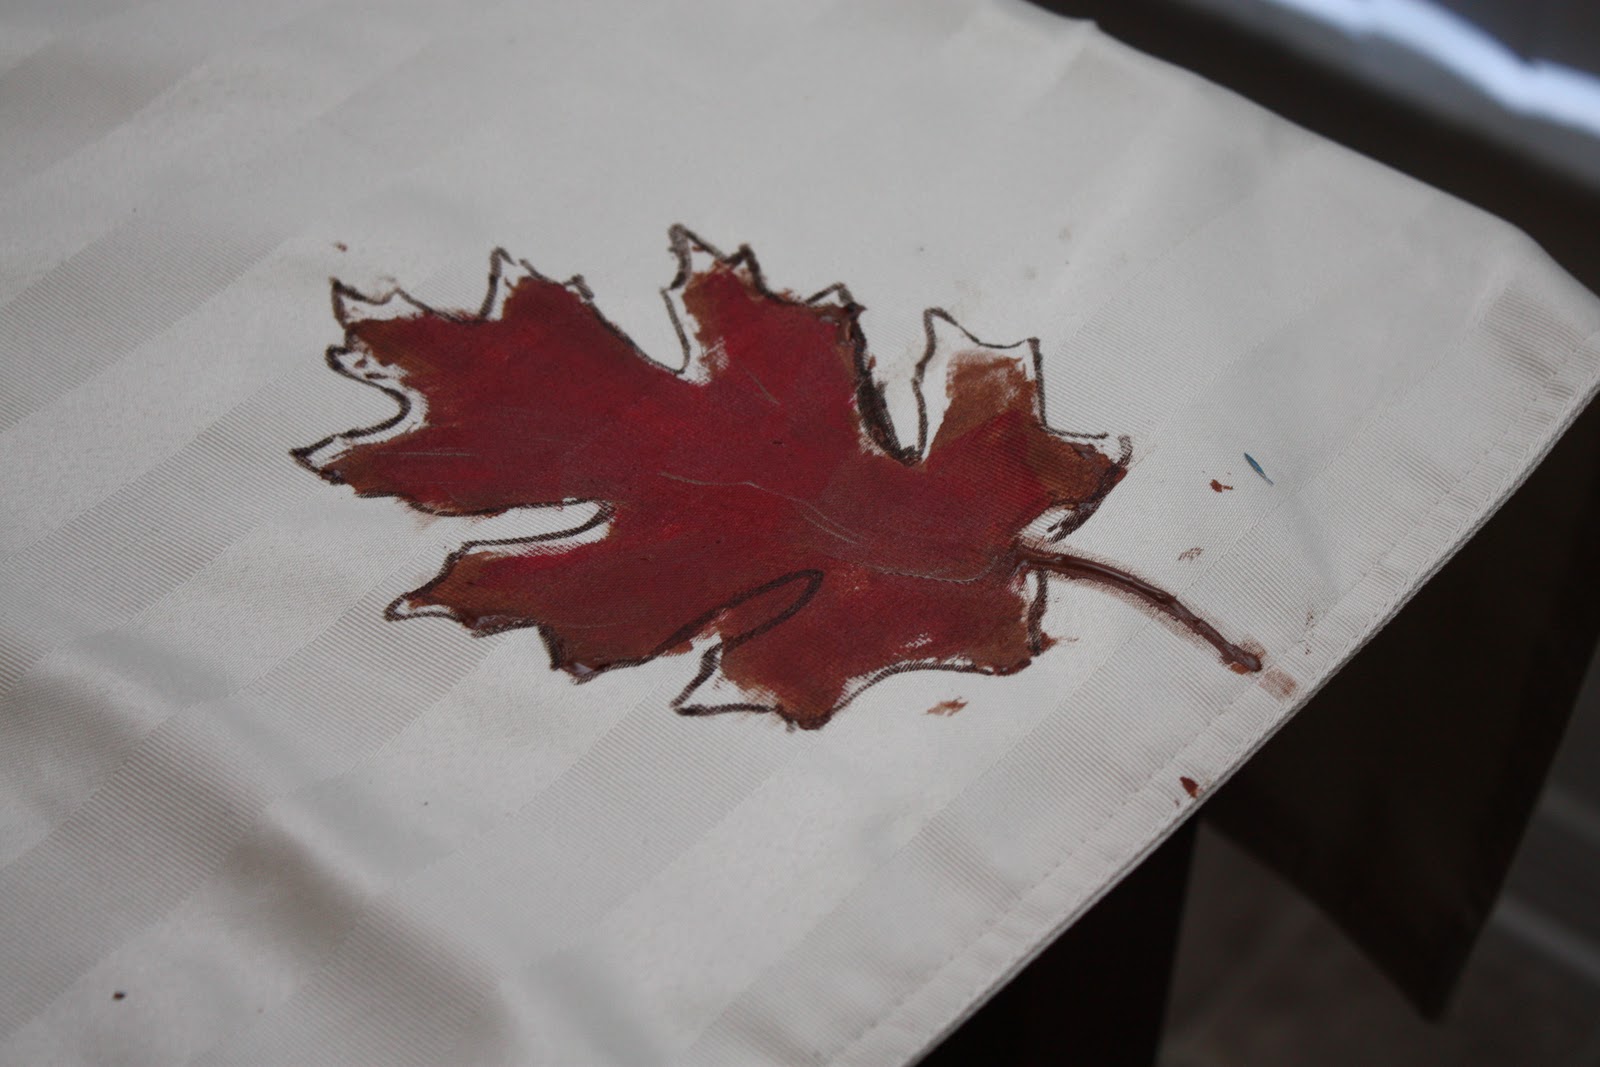
I
painted the leaf we had found and tried to put the print on the table
runner. I had taken the kids on a leaf hunt earlier in the day, but we
don't have any cool fall leaves in our neighborhood. Thankfully, I had
one leaf that I found at the park with the kids the other day. The
impression didn't work too well, so I went to buy fabric markers. I
traced the leaf and painted in the rest with brown and red on one side
and orange and red on the other.
I
finished painting in everything. I used the fabric paints to add the
leaf details and added our names and it's done! :) Well almost. I need
to finish the leaf on the left and possibly outline our hands with the
fabric marker to clean it up a little.
What do you think??


